
Installing QGIS
Go to the QGIS Download page here, and follow the appropriate instructions below. We recommend installing the most stable version.
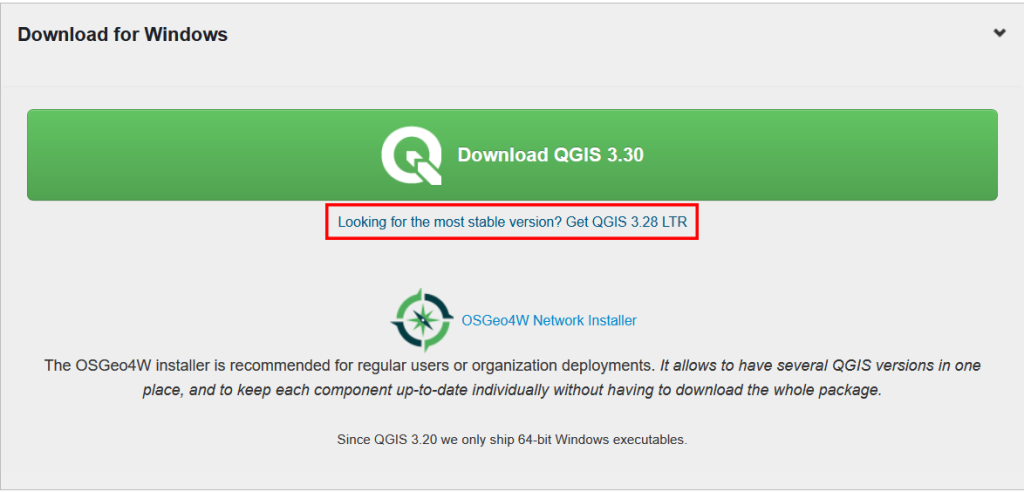
Windows
- Click the blue link below the green “Download QGIS #.##” button under “Download for Windows” and accept the download prompt.
- Run the downloaded .msi file and follow the instructions.
Mac
macOS High Sierra (10.13) or newer is required.
- Click the blue link below the green “Download QGIS #.##” button under “Download for macOS” and accept the download prompt.
- Open the downloaded file and follow the prompts.
NOTE: QGIS is not yet notarized as required by macOS Catalina (10.15) security rules aka when you first try to open the application, please control-click on the icon and choose Open from the context menu. Then select Open in the confirmation dialog.
Linux
QGIS is available for a range of Linux distributions – follow the instructions for each found here.
Organizing Your Files
We cannot stress enough how important it is to devise (and follow) a plan for how you will organize your files.
We recommend having a single folder that you use to store all of the files associated with your QGIS projects – whether raw data, processed outputs, maps that you’ve created, or anything else you may include in your mapping projects. The files should be organized into folders within this, but you want to maintain that single, top-level project folder.
Additionally, we highly recommend keeping a copy of all original data (i.e. gps points, exports from surveying equipment, scans of images that you plan to georeference, files provided by colleagues, etc) in folders with names that indicates these files should not be edited. If you plan to use one of these files, save a copy into another folder and add that to QGIS. For example, your file structure may look like this:
- ../ArchaeologicalProject (this is the top-level folder containing everything related to your QGIS work)
- ../ArchaeologicalProject/Originals (this is the folder containing the raw data or original files for all the data you have collected)
- ../ArchaeologicalProject/Originals/2024Season/TotalStationExports
- ../ArchaeologicalProject/Originals/2024Season/ScannedMaps
- ../ArchaeologicalProject/Originals/2023Season/TotalStationExports
- ../ArchaeologicalProject/Originals/Smith_survey_data
- ../ArchaeologicalProject/Working (this is the folder where you copy data that you are going to be processing, analyzing or working with)
- ../ArchaeologicalProject/Working/2024Season/TotalStationProcessing
- ../ArchaeologicalProject/Working/2024Season/ScannedMaps/Georeferencing
- ../ArchaeologicalProject/Working/2023Season/TotalStationProcessing
- ../ArchaeologicalProject/Working/DistributionMaps
It can also be helpful to devise a file naming convention for your projects. Things to think about when coming up with your convention:
- how to indicate the source
- whether you want to include the date
- how to indicate edits such as
- processes or analyses that were run to produce this file/layer
- joins or filters that have been applied
- whether you will be using statistical software or other applications that may have their own requirements (i.e. no spaces, lowercase, etc)
Installing and Removing Plugins
You can add plugins to QGIS that add many convenient functions. This can greatly expand the features available but also introduces complexity. The plugins are created by individuals or organizations and then submitted so will be in a variety of languages and may address quite niche use cases. Pay attention to the ratings and number of downloads as clues to the quality of the plugin.
We’ll add the plugin QuickMapServices to QGIS.
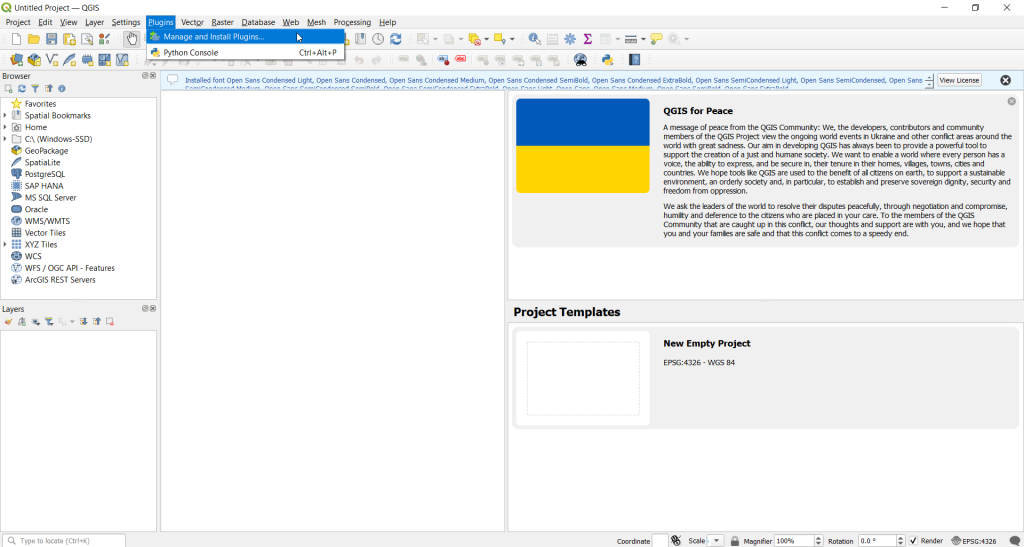
- Open QGIS, and click on Plugins > Manage and Install Plugins.
- Search for “QuickMapServices” in in the search bar of the Plugins window.
- Select “QuickMapServices” in the middle column, and then click Install Plugin.
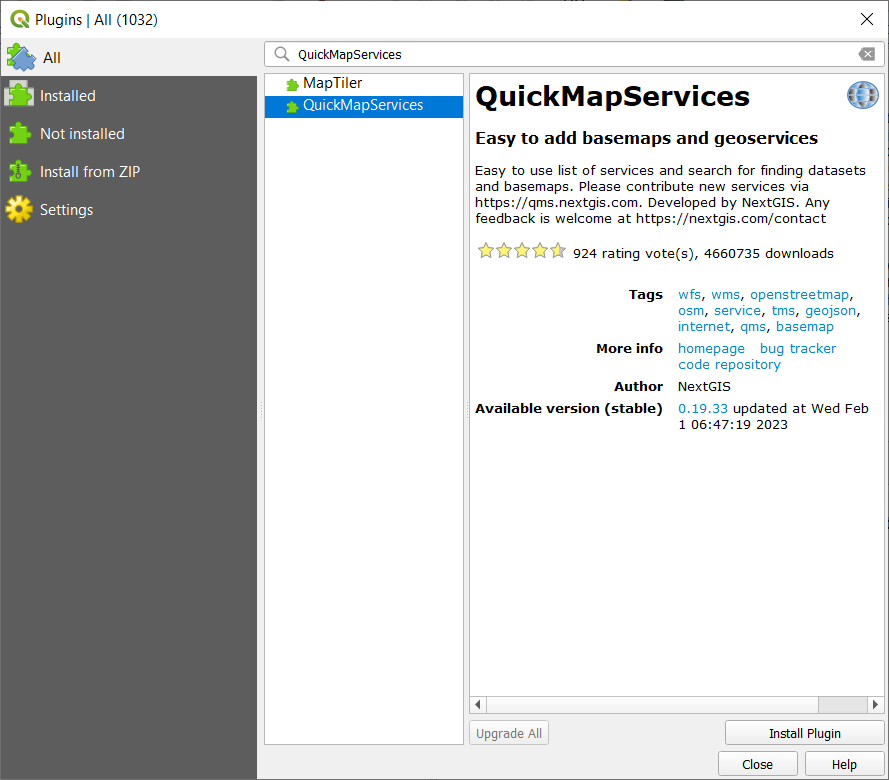
- The QuickMapServices icons should appear on the toolbar.

If you do not need a particular plugin, there are two methods of removing it: deactivating and uninstalling.
- Deactivation leaves the plugin installed in QGIS but turns off its features, so that if you need it in the future you can turn it back on
- Uninstalling removes the plugin (and its files) from your copy of QGIS, and to use it again you will have to reinstall it.
Navigate to the Plugins window as before, and click on “Installed” in the left sidebar.
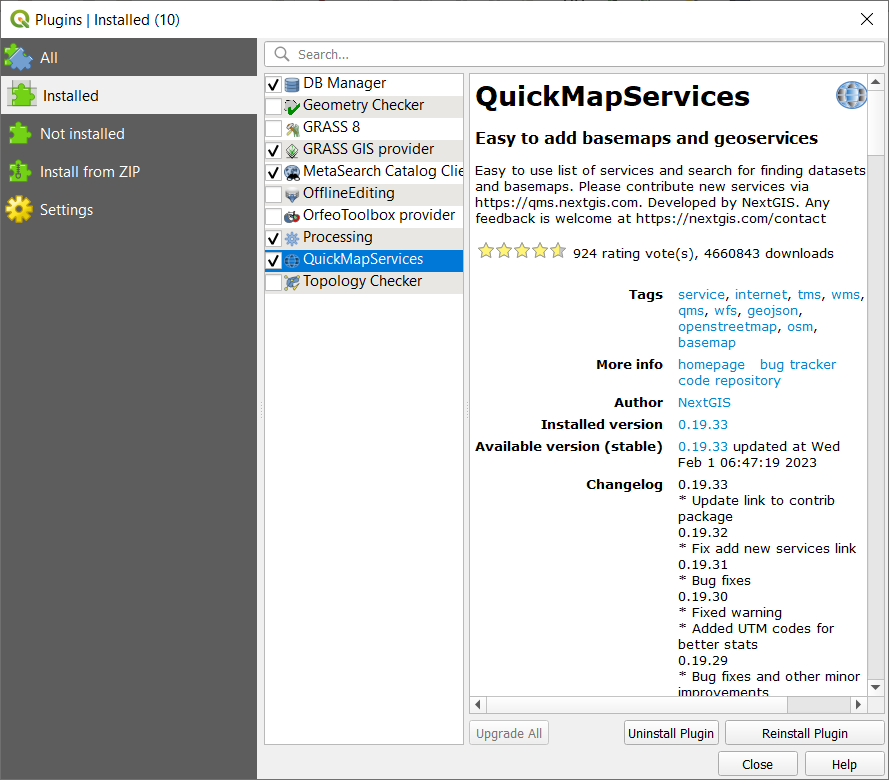
- To deactivate the plugin, click the checkmark next to the plugin’s name.
- To uninstall the plugin, click on the plugin’s row in the middle column, then click “Uninstall Plugin”.
Adding a Basemap with QuickMapServices
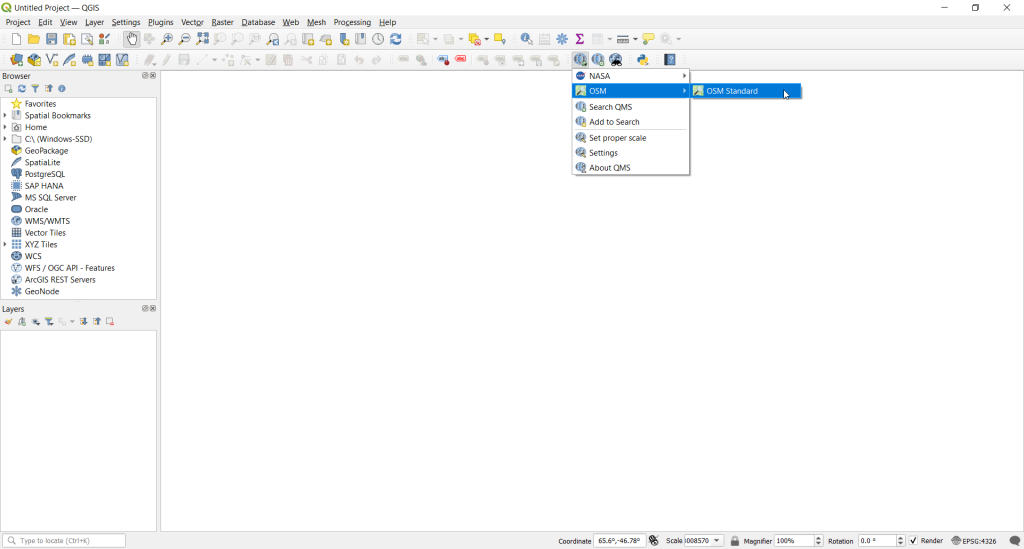
To add a street map, click on the QuickMapServices toolbar icon to open the menu and select OSM > OSM Standard (or alternatively through the menus Web > QuickMapServices > OSM > OSM Standard)
For other maps, you can use the Search QMS tool to find and add it to QGIS.
Overview of the Interface
When you open up a new project, your QGIS window will look like this:
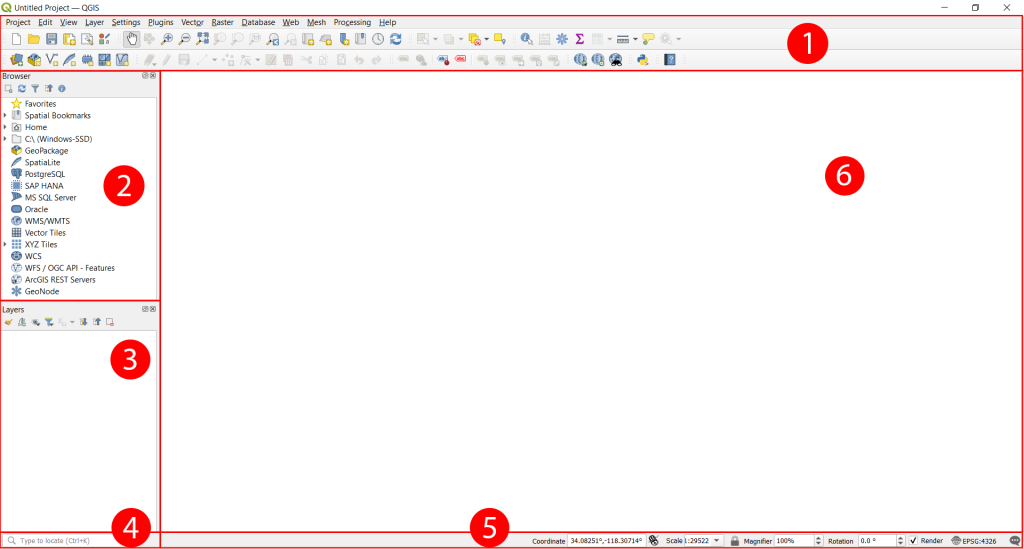
- Toolbars and Menus
- All tools (including plugins) are accessible through the menus, but for easy access, they can also be placed onto the toolbars. You can turn on and off toolbars for specific menus and functions through View > Toolbars.
- Browser
- This panel allows you to navigate through your database and files, connect to common databases, and access common vector files.
- Layers List
- This lists the layers you have added to the project. You can hover over a layer to get basic information about it, expand it (by clicking the adjacent arrow or plus sign) to get information about its appearance, and right-click for more options to edit the layer.
- Layers can be turned visible and invisible by checking and unchecking the box next to a layer’s name, grouped with the “add group” button
 , and removed with the “remove layer/group” button
  located at the top of the layers panel.
- Locator Bar
- Searching in the locator bar will direct you to almost all QGIS objects in your project, specific settings, and more.
- Status Bar
- This shows properties about the map you currently have loaded.
- Coordinate displays the coordinates of the mouse on the map. Clicking on the coordinates and typing your own in will make QGIS display the map around the entered coordinates. Clicking on the mouse icon
 will toggle from Coordinate mode to Extents mode. The bar will display the coordinates of the bottom-left corner and top-right corner of the current map view, separated by a colon. Clicking again on
  will revert it back to displaying the coordinate of the mouse.
 - Scale represents the map scale, and it can be manually inputted as with the coordinates. By default, zooming in and out changes the scaling value here.
- Magnifier denotes the level of magnification on the map. This can be inputted manually, or the up and down arrows can be used to increment by 50%.
- Clicking the lock button

to the left of Magnifier will lock the value of Scale, and zooming in and out will only affect the Magnifier level field. Clicking again will change the scaling by zooming in and out, rather than the magnification, as before.
- Rotation allows you to rotate your view of the map. Increasing the value rotates the map clockwise, and decreasing rotates counterclockwise. You can click the up and down arrows to increment by 5.0° in either direction, or manually input the desired angle.
- The Render checkbox indicates whether or not QGIS will continuously re-render and re-draw the map whenever the view is changed, either through zooming in/out or panning the map.
- Clicking on the globe

allows you to choose a Coordinate Reference System (CRS) for the project. The authority code of the CRS used is displayed next to it.
- Clicking on the speech bubble allows you to see log messages, which may be useful for debugging.
- Map Canvas
- This is where the map layers will be displayed after they have been added.
- You can move the map around by selecting the “Pan” tool

in the toolbar and left-click and dragging on the map.
- You can zoom in or out using the scroll wheel, or by using the Zoom In
 and Out
  tools on the toolbar
.
- Using the scroll wheel, hover the mouse over the area you wish to zoom in to and scroll up. To zoom out, scroll down.
- With the tools, left-clicking on the map will zoom in and out when the respective tools are selected. Left-click, hold, and drag to zoom into a particular region of the map.